Using Firebase Auth in Insomnia
Feb 11 2022

Step 1
Create a POST request within insomnia using the following URL (API_KEY can be found in Firebase -> Project Settings, as “Web API Key”).
https://identitytoolkit.googleapis.com/v1/accounts:signInWithPassword?key=[API_KEY]With the following JSON body:
{
  "email": "[<](mailto:joshuarichards001@gmail.com)email>",
  "password": "<password>",
  "returnSecureToken": true
}
Hit send to test that it works and you should get a response looking something like this:
{
  "localId": "ZY1rJK0eYLg...",
  "email": "[user@example.com]",
  "displayName": "",
  "idToken": "[ID_TOKEN]",
  "registered": true,
  "refreshToken": "[REFRESH_TOKEN]",
  "expiresIn": "3600"
}
Step 2
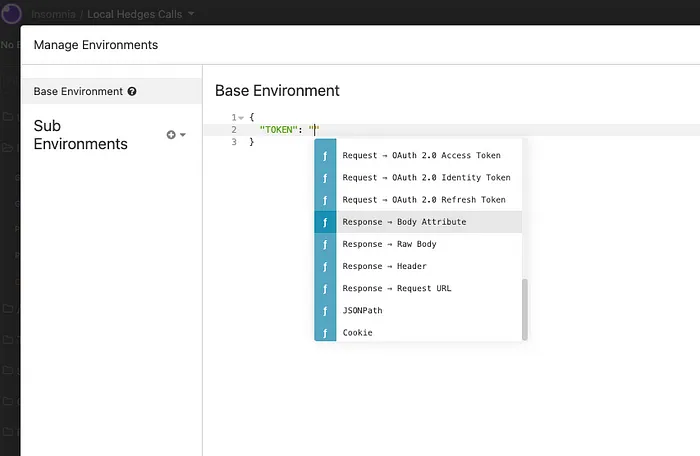
Next, open up the “Manage Environments” tab in the top left corner under the Insomnia icon (or using ⌘ + E).
Once inside create a field called TOKEN and when inputting its value type Ctrl + Space and navigate to the “Response -> Body Attribute” option.

Select this option and then click on it again to edit the Tag.

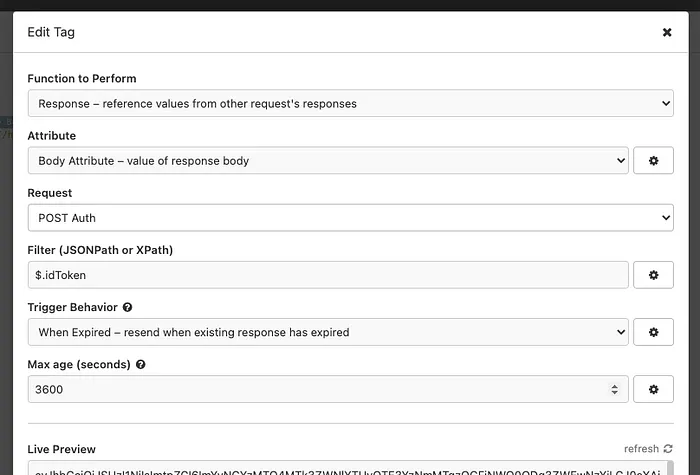
Within the tag editor you want to:
- Select the API Request you created from the start of the guide (e.g. POST Auth).
- Filter: set to “$.idToken”
- Trigger Behavior: set to to “When Expired”
- Max age: set to “3600” (Because that’s how long the Token lasts)
It should look like this. If done correctly the token should be displayed in the “Live Preview” section.

Step 3
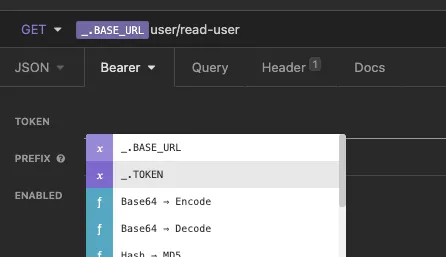
Finally, you need to navigate to the API call you want to attach the Authentication to. Once there click on the “Auth” tab and select the “Bearer Token” option.
Under the TOKEN field once again type “Ctrl + Space” and select the “TOKEN” variable we just created.

Once selected click send and it should all work as intended! You are now able to access your Firebase Auth protected server from the Insomnia API Client.
Thanks for reading and hopefully this helped out. This is my first ever article so if you have any feedback and/or questions please leave me a comment.
Have a good one!
